
双端 Diff 算法原理解析及 snabbdom 简单实现
admin
2024-03-07 07:11:45
0次
一、准备工作
- 先找个放猪的容器
canvas,这里宽设置了1200,高设置了600
- 然后获取它进行操作
const canvas = document.getElementById('canvas');
if(canvas.getContext) {// 获取绘图上下文var ctx = canvas.getContext('2d');//然后就可以咔咔咔咔进行操作了
}
- 这里我顺便还设置了一下样式
ctx.fillStyle = 'pink'; //填充的颜色为粉红色ctx.strokeStyle = "#f95a75"; //描线的颜色ctx.lineWidth = 4; //描线的厚度
前面会详细一点,后面就阿巴阿巴了
二、吹风机头
- 这个我一直不知道要怎么处理比较好,最后调啊调啊,采用两个半圆加上一个椭圆完成
- 下面先绘制一个半圆* 每一次绘画前都要用
ctx.beginPath()开启绘画,防止跟前面的藕断丝连* 画圆的操作:ctx.arc(x,y,radius,startAngle,endAngle,anticlockwise)*x,y为圆的圆心坐标*radius为半径*startAngle,endAngle分别为圆弧或圆的开始位置,结束位置*anticlockwise是绘画方向,默认false为顺时针方向
ctx.beginPath();ctx.arc(300, 200, 80, 0, Math.PI, false);ctx.fill();
- 右上角也是一个半圆,一样的操作
ctx.beginPath();ctx.arc(310, 200, 70, 0 , Math.PI,true);ctx.fill();
- 左上角为一个椭圆* 椭圆操作:
ellipse(x, y, radiusX, radiusY, rotation, startAngle, endAngle, anticlockwise)*x,y为椭圆圆心坐标*radiusx为椭圆的在x轴和y轴的半径*rotation:椭圆自身旋转的方向*startAngle,endAngle分别为圆弧的开始位置,结束位置*anticlockwise是绘画方向,默认false为顺时针方向
ctx.beginPath();ctx.ellipse(250, 160, 120, 60, Math.PI*0.1, 0, 2 * Math.PI);ctx.fill();
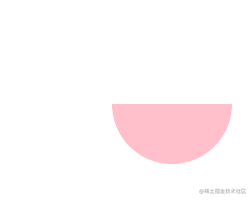
这样看好丑,我们快搞个猪鼻子来遮遮丑
三、五官
👉鼻子
- 先召唤鼻子出来把那个椭圆的前面挡掉,它太圆啦
- 鼻子也是采用了一个椭圆
- 设置了
ctx.globalCompositeOperation = 'source-over',目的是为了它能够在最前面不被遮挡 - 把描线的宽度改为3
ctx.lineWidth = 3
ctx.beginPath();ctx.ellipse(162, 127, 22, 32, Math.PI*0.12, 0,2*Math.PI, true);ctx.globalCompositeOperation = 'source-over'ctx.lineWidth = 3;ctx.fill();ctx.stroke();
👉耳朵
- 耳朵大概让它看起来更像一个头吧
- 耳朵采用了两个小椭圆
- 注意这里采用了:
ctx.globalCompositeOperation = 'destination-over',就是表示它要当缩头乌龟了,跟其他重叠的地方它要隐藏,不然我们这里椭圆下面描线外露就会很丑就是说 - 这里的椭圆我也给他倾斜了,不是直挺挺立着的
ctx.beginPath();ctx.ellipse(250, 100, 15, 40, Math.PI*0.05, 0, 2 * Math.PI, true);ctx.ellipse(300, 115, 15, 40, Math.PI*0.1, 0, 2 * Math.PI, true);ctx.globalCompositeOperation = 'destination-over'ctx.fill();ctx.stroke();
很好,现在已经很有猪感了
👉眼睛
- 眼睛是灵魂,我们来画猪点睛
- 眼睛这里是采用外面用白色的填充,里面填充一个小黑点,左右眼的操作是一样的,下面是左眼的操作,右眼就不废话啦
ctx.beginPath();ctx.arc(235,125,12,0,Math.PI*2); //这里是外面的白色的那个圆ctx.fillStyle = '#fff'ctx.globalCompositeOperation = 'source-over' //注意这里也是让它不要被遮挡ctx.fill();ctx.stroke();ctx.beginPath();ctx.arc(232,123,4,0, Math.PI*2); //这里画中间的小黑眼珠ctx.fillStyle = 'black';ctx.fill();
很好,不愧是灵魂的存在,我已经要爱上这只猪了
👉嘴巴
- 嘴巴我们要求的是《微笑唇》
- 不过它相当简单,给他加个圆弧就好了,不过这里是歪嘴巴哦,所以我调了一下数据
ctx.beginPath();ctx.arc(280,215, 35, Math.PI*0.2, Math.PI);ctx.stroke();
因为我对它逐渐喜爱,所以它害羞了,来给它加点腮红
👉腮红
- 加个填充圆就好了
ctx.beginPath();ctx.arc(325, 200, 30, 0, Math.PI*2);ctx.fillStyle = '#ff9cc1'ctx.fill();
头到这里就搞定了,堂堂佩奇大丈夫当然要有身子
四、身体
👉衣服
- 先上衣服遮遮羞,大家都知道,咱们小猪当然是穿裙子最好啦(Bushi,是因为最方便画)
- 这里采用了画线(梯形)填充 + 二次贝塞尔线填充,让裙子更有感觉
- 这里依旧使用了
ctx.globalCompositeOperation = 'destination-over',不清楚为啥用的回看耳朵那里 - 二次贝塞尔线:
quadraticCurveTo(cp1x, cp1y, x, y)*cp1x和cp1y为控制点*x和y为结束点* 可以借助它来调试Canvas Quadratic Curve Example (sitepointstatic.com)
ctx.beginPath();ctx.globalCompositeOperation = 'destination-over'//不会有人到这里都不知道它是干嘛的吧ctx.fillStyle = '#ff6464';ctx.moveTo(240,245);ctx.lineTo(200,400);ctx.lineTo(400,400);ctx.lineTo(350,245); //到这里目的是给它传上了一件程梯形形状的裙子ctx.moveTo(240, 245);//给裙子左边加点弧度ctx.quadraticCurveTo(177, 350, 200, 400);ctx.moveTo(350, 245);//给裙子右边加点弧度ctx.quadraticCurveTo(448, 350, 400, 400);ctx.fill();
这裙子不能买,显胖
👉手
- 手这里我们就简简单单过了,使用的东西我们之前基本都用过
- 下面的代码为左手,右手的我忽略了
ctx.beginPath();ctx.moveTo(230, 290);ctx.lineTo(150, 320);ctx.stroke();ctx.beginPath();ctx.moveTo(175, 312);ctx.lineTo(145, 310);ctx.moveTo(175, 312);ctx.lineTo(170, 330);ctx.stroke();
👉脚
- 脚就更简单了哈哈,把线调粗一点,画两条线即可
- 依旧是左脚代码
ctx.beginPath();ctx.strokeStyle = '#f08181';ctx.lineWidth = 10;ctx.moveTo(260,400);ctx.lineTo(260,450);ctx.stroke();
俗话说,赤脚不怕穿鞋的,但是我们猪猪哪里需要那么凶,就要鞋就要鞋
👉皮鞋
- 先来双破鞋
- 又一看,感觉这个鞋子,四四方方,那里像双鞋子的样子
ctx.beginPath();ctx.strokeStyle = 'black';ctx.globalCompositeOperation = 'source-over'ctx.lineWidth = 15;ctx.moveTo(260,450);ctx.lineTo(240,450);ctx.stroke();
- 来加点料
- 我们可以通过
lineCap设置线条的样式*butt:默认的就是它,方方正正,端点是垂直于线段边缘的平直边缘*round:这个就是我们皮鞋的正宗用料了,端点是在线段边缘处以线宽为直径的半圆*square:端点是在线段边缘处以线宽为长,以一半线宽为宽的矩形 - 所以我们给他设置
ctx.lineCap='round',就相当于给它穿上高级鞋子了
五、文字
- 既然本意是来熟练操作的,那么自然不能放过文字啦
- 文本也是两种方式,分别为填充和描边,我们这里使用的是填充
- 填充文字:
ctx.fillText(text, x, y, maxWidth)*text:绘制的文案*x、y:文本的起始位置*maxWidth:可选参数,最大宽度
ctx.beginPath();ctx.fillStyle = 'pink'ctx.ellipse(550, 150, 150, 100, 0, 0, 2 * Math.PI);ctx.fill();ctx.beginPath();ctx.font = "50px serif"; // 设置文案大小和字体ctx.fillStyle = "#ee7934"; //设置填充颜色ctx.fillText('不准再说我丑了', 450, 160, 200); //这里去填充文字
最后
整理了75个JS高频面试题,并给出了答案和解析,基本上可以保证你能应付面试官关于JS的提问。

有需要的小伙伴,可以点击下方卡片领取,无偿分享
相关内容
热门资讯
原创 人...
2023年,联合国人口司报告:印度人口超过了中国。中国丢掉了“世界第一人口大国”的帽子,马路上娃娃车...
缓解亏损压力,消息称Meta明...
IT之家 5 月 30 日消息,科技媒体 The Information 今天(5 月 30 日)发...
原创 大...
" 作者丨追命 编辑丨坚果 封面来源丨Unsplash " 近日,刘强东的“兄弟论”又一次刷屏。...
美国软件股逆袭,创2001年以...
Snowflake与Okta强劲财报提振情绪,市场对AI颠覆软件行业的极端悲观预期开始松动。 Sno...
原创 5...
一夜之间,黄金价格犹如经历一场惊心动魄的“踩踏”,重重跌破了4500美元/盎司的心理大关,昔日被视为...
德康农牧(02419.HK)获...
格隆汇5月29日丨根据联交所最新权益披露资料显示,2026年5月28日,德康农牧(02419.HK)...
37岁公司董事长、车手张秀军比...
每经编辑|何小桃 5月29日,2026中国环塔国际拉力赛组委会发布通告:5月26日,在2026中国...
原创 人...
观察者网报道,本周在纽约经济俱乐部的一场专题讨论会上,加拿大总理卡尼发表了一番引发广泛关注的讲话。这...
反复尿路感染别只吃消炎药
很多人尿频、尿急、尿痛一发作,就自行购买消炎药服用,症状消失就立刻停药,这是尿路感染反复发作的主要原...
原创 散...
最后再说一遍:散户对白酒、地产的理解是大错特错了…… 投资是投资,现实是现实,行业是行业,大家必须分...
从Vinexpo Asia 2...
5月26日至28日,Vinexpo Asia – Be Spirits – Be No 2026亚洲...
原创 金...
今天去商场转了一圈,金店柜台前的人比上个月少了很多。 看了下当天挂牌价,东方大国黄金的首饰金报在13...
消费资产今日全线回暖,港A两套...
今日消费板块呈现明显回暖态势,港股新消费龙头表现抢眼。 泡泡玛特(09992.HK)、 安踏体育(0...
滴滴开放日走进判责客服:讨论纠...
5月28日,滴滴开放日在大连客服职场举办。活动聚焦“体验与服务”,邀请司机、乘客、媒体、行业专家等各...
中餐出海进阶:狂飙过后,该算账...
近几年,随着出境游热度攀升,越来越多的国人发现,不管是东南亚的市井街头,还是欧美的核心商圈,总能轻易...
A股“芯”征程:5%科技龙头虹...
A股上演“冰火两重天”:一边是白酒、地产等传统“核心资产”持续遇冷,一边是芯片、半导体等新兴题材不断...
上海大模型龙头,启动A股上市!
来源:智东西 新一代旗舰模型也即将发布。 作者 | 陈骏达 编辑 | 李水青 智东西5月30日报道...
MiniMax正式启动A股IP...
据证监会官网IPO辅导公示系统显示,MiniMax已向上海证监局提交A股IPO辅导备案,中信证券担任...
三重利好共振推动港股内房股反弹...
5月29日,港股内房股显著拉升, 碧桂园(02007.HK)涨幅超38%, 融创中国(01918.H...
利空突袭,全线大跌!马斯克,紧...
在IPO前夕,马斯克的SpaceX突遭“拉黑”。 据最新消息,丹麦养老基金AkademikerPen...